

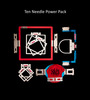
Also Includes

INCLUDED: In Store Instruction


Brother Premium Warranty 2 years parts and labor, 6 years electronic parts, 25 years metal casting..
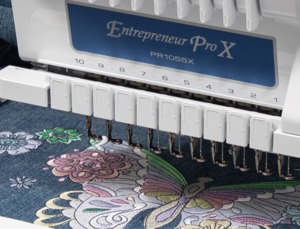
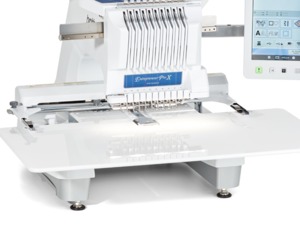
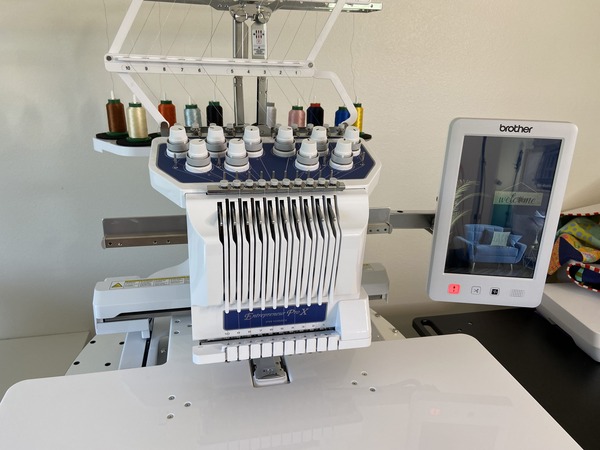
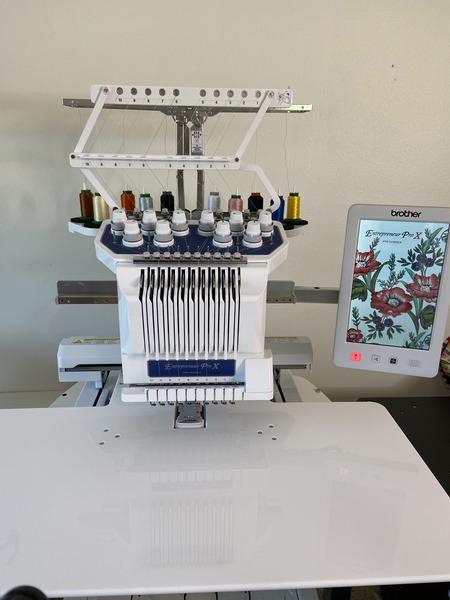
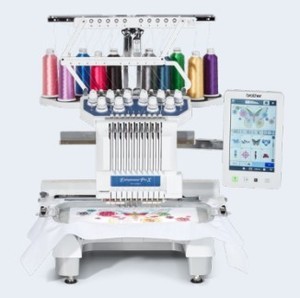
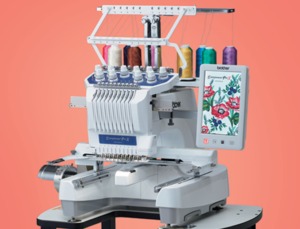
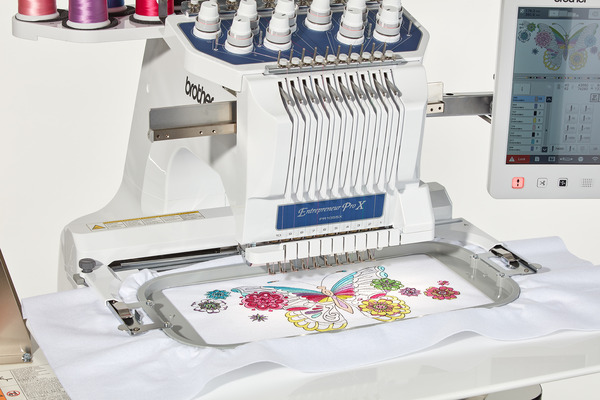
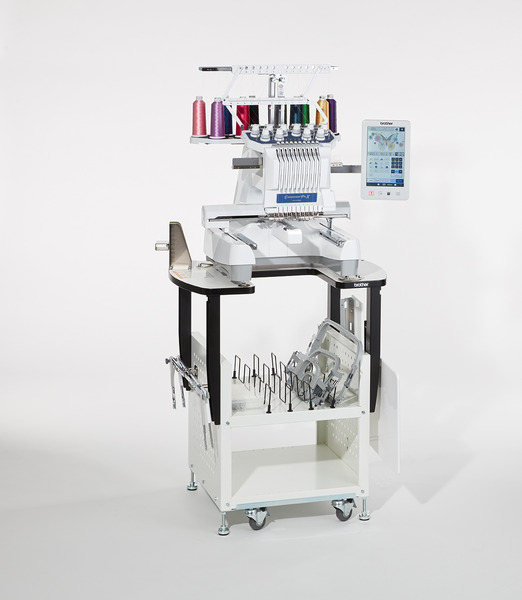
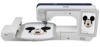
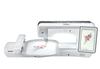
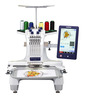
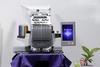
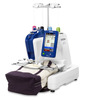
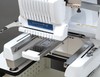
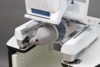
The PR1055X comes equipped with some of the most powerful design and editing capabilities ever built into a multi-needle embroidery machine. Take a closer look at the revolutionary Entrepreneur® Pro PR1055X, a highly powerful and efficient 10-needle embroidery machine, but with the ease-of-use and reliability that only Brother can provide. The PR1055X raises the bar within the industry for embroidery enthusiasts, crafters and home-based entrepreneurs.
Just when you think you’ve reached the limits of creative freedom, look again...eXplore the possibilities!
Click here for more information on the Brother PR1055X (.pdf)
Multi-Needle Comparison Chart Entrepreneur Pro X PR1055X, Entrepreneur Pro X PR1050X, Entrepreneur 6-Plus PR670E, Persona PRS100 (.pdf)
New Features:
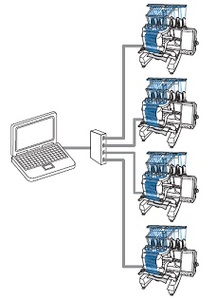
Wireless LAN
- Choose either wireless LAN or USB cable for link mode for PE-Design
- Easy to connect and place machines—you can connect up to 10 machines!
Quilt sashing function with live camera
- New 2-color quilt sashing is now available!
- Only the "Semi-Auto split quilt sash" function is available.
- Available frames for this function: LLL (360 x 200), LL (300 x 100), Border Frame (300 x 100), Magnet Sash Frame (360 x 200)
New Embroidery Data
- 5 patterns of 2-color quilt sashing are now available.
- 26 new patterns of decorative fill are available on My Design Center.
Thread spool change and thread breakage message on LCD
- When you need to change threads "New Message" will be displayed and the LED light for the sew area will flash.
- If you close the popup, you can recall "Change Thread Spool Information" before flicking the unlock key.
Alignment function on editing
Individual start point setting for each embroidery element
- To make each embroidery element positioning easier, starting points are set individually.
- You can choose either whole elements or individual elements.
Sound volume setting for operations and notification
Lighting brightness setting for sewing and notification
New embroidery screen
My Stitch Monitor
- Monitoring app for machine
- Upgrade in My Stitch Monitor for multi-needle machine
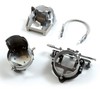
New Accessories: Flat brim cap frame (set), magnetic sash frame, and tubular frame table
New Technology from Other Models
- Undo/redo function on editing (from Stellaire)
- Re-editing function of lettering (from XP-Luminaire and Stellaire)
- Thread brand changing (from XP-Luminaire and Stellaire)
- Favorites button for color shuffling (from XP-Luminaire and Stellaire)
- Echo quilt function (from XP-Luminaire)
- Same color button (from PR670)
- No sewing button (from PR670)
- New UI and redo function from My Design Center (from XP-Luminaire)
- Increase date displaying format choices (from XP-Luminaire and Stellaire)
FEATURES:
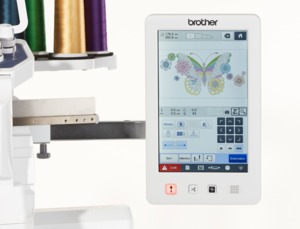
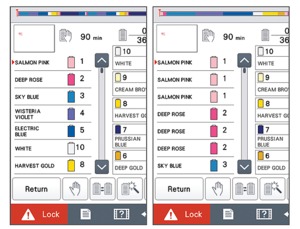
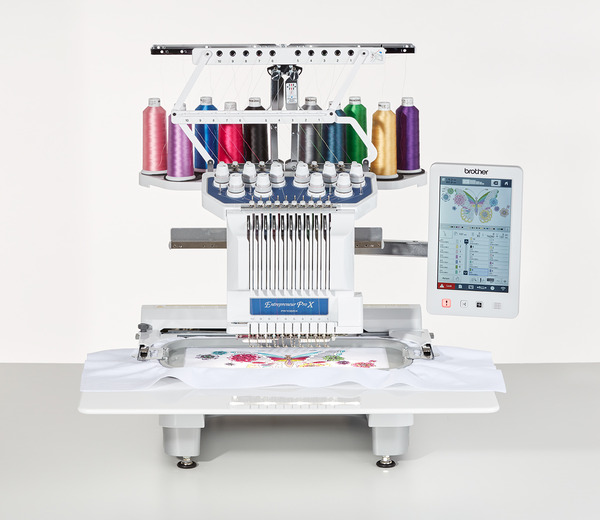
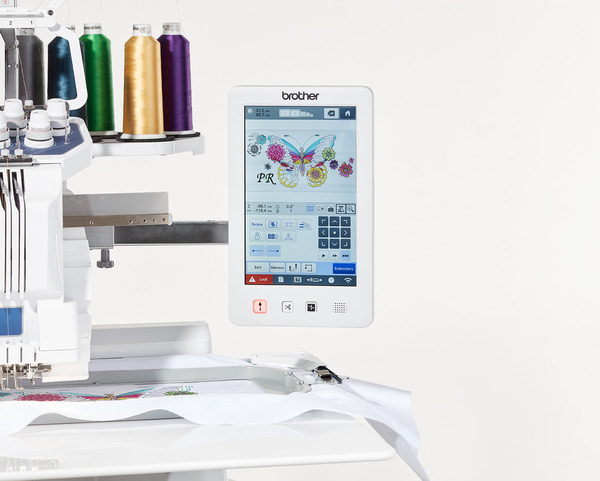
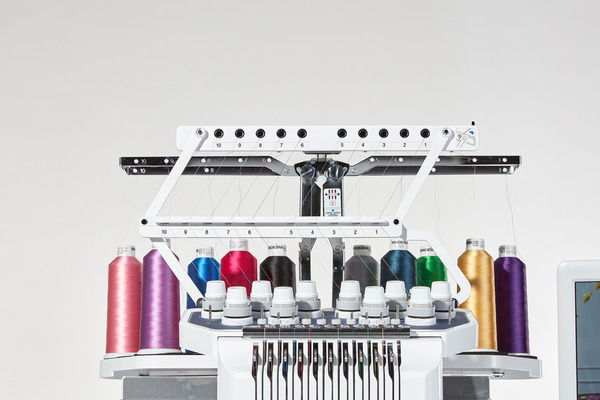
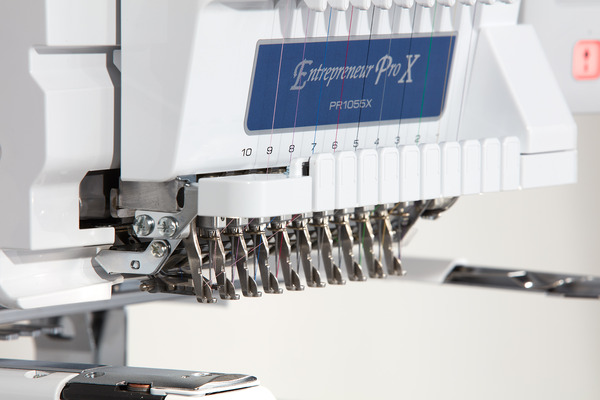
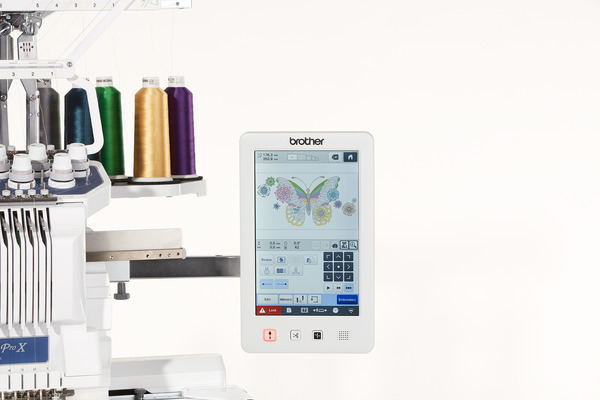
•10 Needles and Large 10.1" Built-in High Definition LCD Display
Increase your productivity with 10 needles and stitch designs up to 10 colors without changing thread. View your creations in a classleading crisp, vivid color LCD display and navigate easily with the scrolling menu and large, intuitive icons. View 29 built-in tutorial videos or MP4 files on-screen.
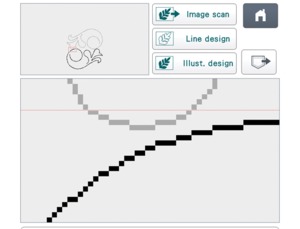
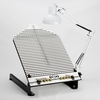
•Brother-Exclusive My Design Center Built-in Software for Virtually Endless Design Possibilities
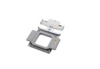
Draw designs directly onto the screen or use the included scanning frame to scan art to embroider. With up to 1600% zoom, view the smallest details of your designs on the LCD display.
•Add Beautiful Stippling and Decorative Fills
Accurately add stippling or echo stitching to any embroidery design, or save the outline, and then choose from 26 new built-in decorative fill patterns. With the embroidery preview mode now 40% wider, see the selected stippling or fill patterns before you begin to stitch.
•Enhanced Embroidery Editing
Elevate your embroidery with the best in class editing features. Left, center, and right alignment; undo and redo functions; grouping after line break; edit a single letter or a full line of text; and ‘no sew’ buttons allow you to turn off color sections of a design.
•Color Sort
When combining designs, you can be even more efficient by having the machine sort the stitch order by color which reduces color changes and needle bar movement to minimize embroidery time.
•Zoom Features
Watch your creations become larger than life with the new zoom function of up to 1600% within My Design Center and up to 200% in other modes.
•Create Beautiful Sashing
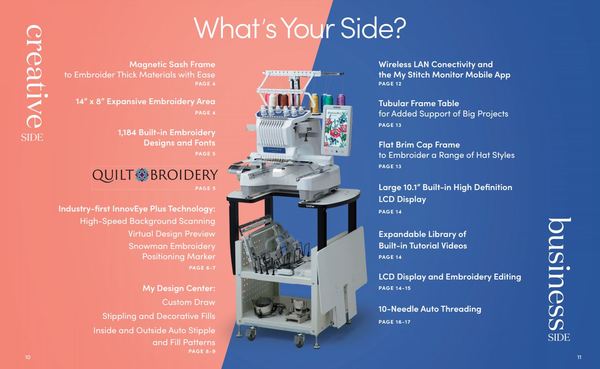
Create beautiful sashing and border patterns sized perfectly for your quilt, up to 118" x 118"!
•Projects with Personalization
Enjoy over 1,100 built-in embroidery designs and 40 size-adjustable embroidery lettering fonts.
•Custom Draw
Draw or doodle directly on the LCD display and watch it spring to life in the large drawing area. Or, use the industry-first ScanImation Scanning Frame to scan drawings, line art, handwriting or printed clip art, and have it transformed into embroidery data.
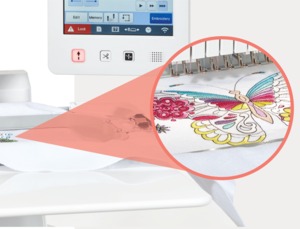
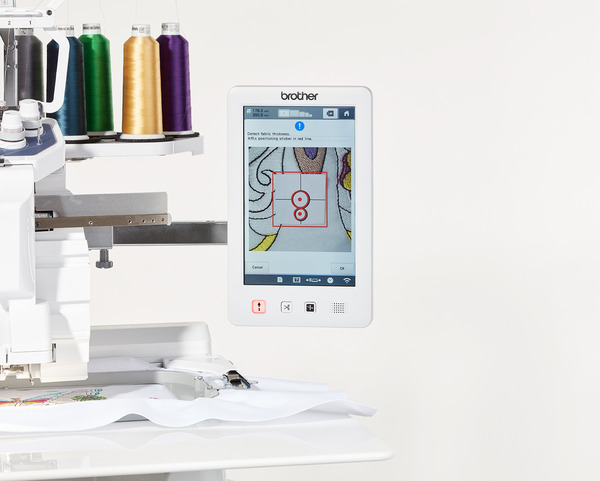
• High-Speed Background Scanning
It’s like having a built-in camera and scanner! The ability to scan the entire embroidery area provides virtually endless creative options and helps ensure that all your projects are perfect. Precisely place your design exactly where you want it every time. Just scan your fabric or garment, preview your design on screen, and you’re ready to embroider.
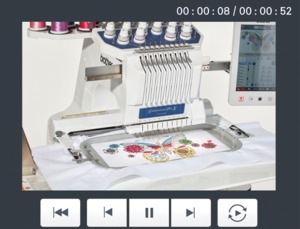
•Expandable Library of Built-in Tutorial Videos
Built-in HD tutorials make learning easy! View 29 tutorial videos directly on the high-definition LCD display, or stream your own creations using the industry standard MP4 format.
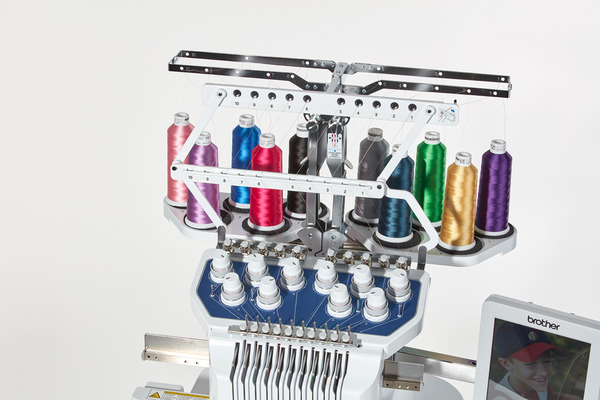
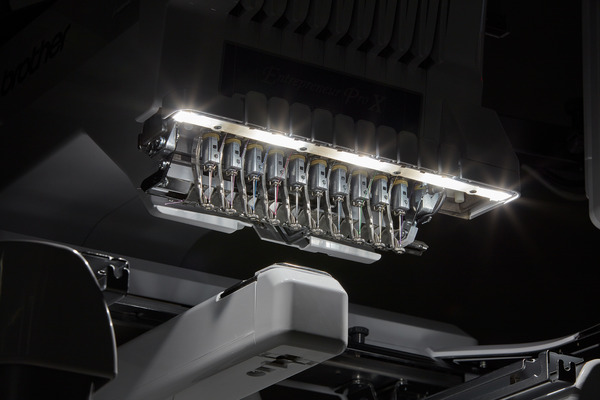
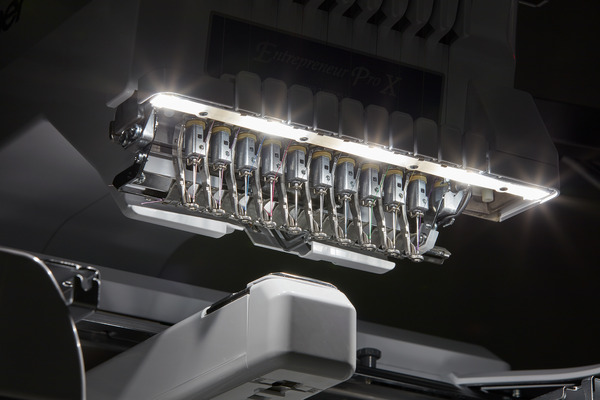
•Notification Feature
There’s no downtime with an important notification system, so you can be super productive. White lights under the needles flash to indicate project completion and thread changes or breaks.
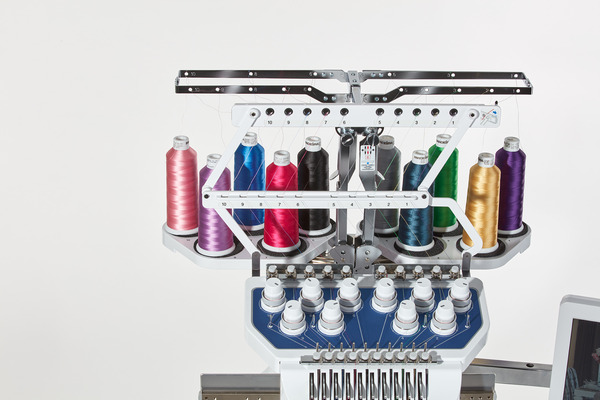
•10-Needle Auto Threading
Makes threading simple! As the only multi-needle machine with a built-in automatic needle threading system, you'll thread each needle in seconds - with just the touch of a button!
•Built-in Embroidery Designs and Fonts with Fast Embroidery Speeds
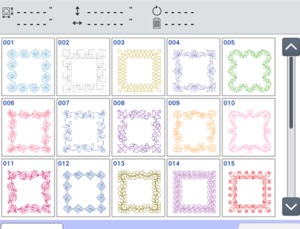
Explore 1,184 built-in embroidery designs, including 140 frame pattern combinations, 40 size-adjustable embroidery lettering fonts, and 11 monogramming font styles. Embroider up to 1,000 stitches per minute in just seven seconds flat with industry leading high-speed acceleration. Get inspired by a wide range of creative designs and fun patterns that are sure to add some artistry to your next project.
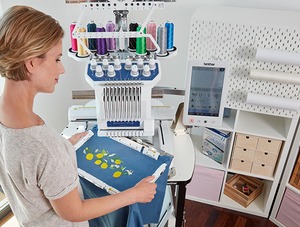
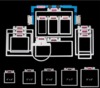
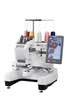
•Expansive Embroidery Area of 14" x 8"
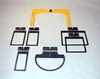
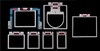
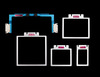
Perfect for large projects, including quilts and jacket backs. Includes four sizes of embroidery frames: 14" x 8", 5" x 7", 4" x 4", and 2" x 1.5". The machine will automatically detect the size of the hoop needed.
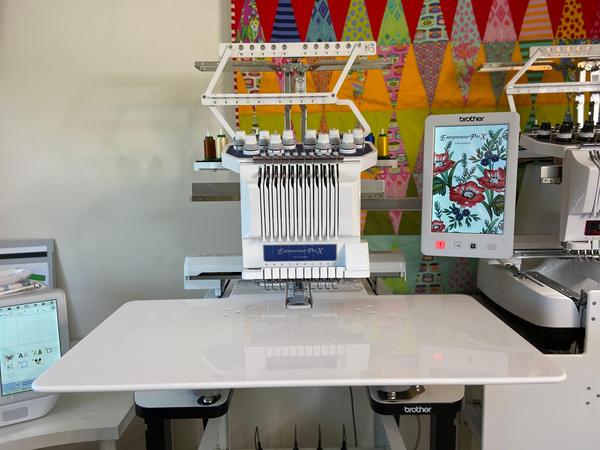
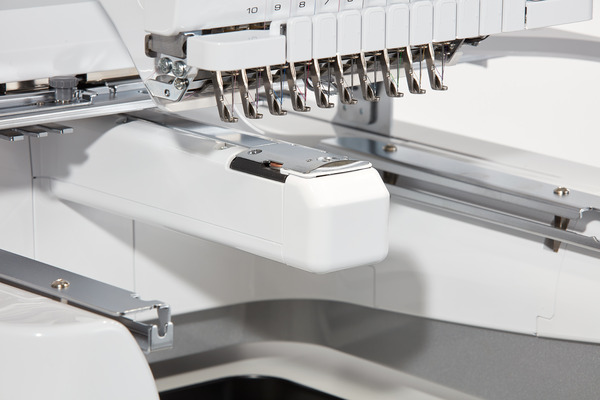
•Industry-First InnovEye Technology with Virtual Design Preview
Get a real-time camera view of the needle area and see your embroidery design on your fabric – no scanning needed! Also, scan your fabric or garment, preview your design on-screen, and you’re ready to embroider. It works with the optional cap and cylinder frames for tight spaces.
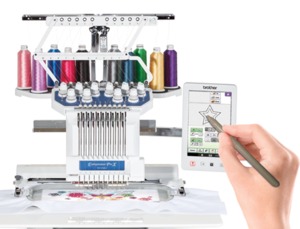
•Wireless LAN Connectivity—My Stitch Monitor Mobile App
Keep track of your embroidery with the My Stitch Monitor mobile app on your iOS or Android device. Follow the progress of your project and get alerts when it’s time to change threads or when your embroidery is finished.
•Wireless LAN Connectivity—Link Function
With wireless LAN connectivity and PE-DESIGN 11 software*, you can link as many as 10 machines without a cable.
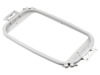
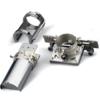
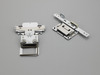
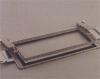
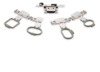
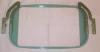
•Magnetic Sash Frame* Patent-Pending Brother-Exclusive Hoopnetic Magnetic Frame
Hoop and embroider thick materials with ease. Avoid fabric shifting and the need to re-hoop the fabric when connecting designs or embroidering large areas. Just slide the fabric on the frame for the next area to be embroidered.
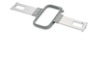
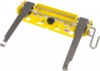
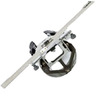
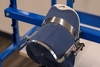
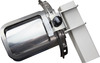
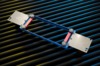
•Tubular Frame Table*
Embroider easily on sleeves, pants, and other tubular items. Serves as extra support for big fabrics. Easily attach and remove with no space between machine and table.
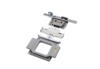
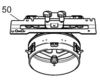
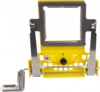
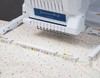
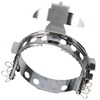
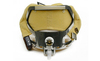
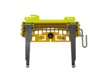
•Flat Brim Cap Frame* Patent-Pending Industry-First ‘Scratch-Free’ Flat Brim Cap Frame
Embroider more types of hats than before with the easy-to-use ‘scratch-free’ cap frame. You can stitch an industry leading 35% closer to the brim (6-10 mm), depending on the cap.
*Magnetic Sash Frame, Tubular Frame Table, and Flat Brim Cap Frame are all recommended accessories. Additional purchase required. See below for other recommended accessories!
PR Recommended Accessories:
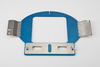
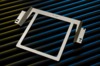
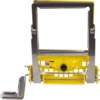
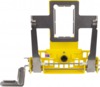
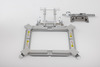
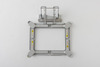
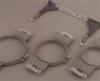
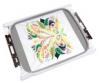
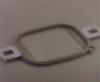
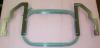
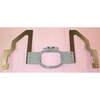
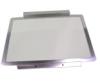
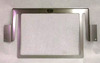
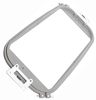
Magnetic Sash Frame
- 360 x 200 mm sew area
- Easy to hoop fabric
- There is no need for pressure or physical force to be able to hoop the fabric. The magnets only need to be affixed while straightening out the wrinkles in the fabric.
- The fabric slides while retaining 1 small magnet each on the upper and lower side of the frame and allows parallel sliding.
- You can frame very thick material without exerting any force.
- You can easily sew the center area of huge material
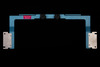
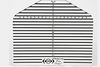
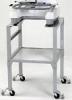
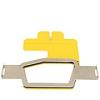
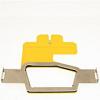
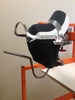
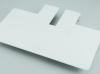
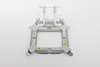
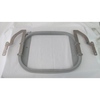
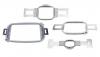
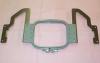
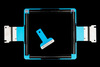
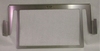
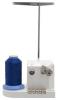
Tubular Frame Table
- Embroider on sleeves, pants, or anything else tubular with this table
- Can attach the table for sewing long fabrics
- Helps with stable sewing by supporting the fabric with the frame
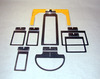
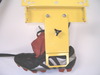
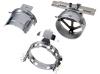
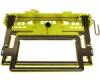
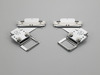
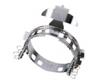
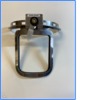
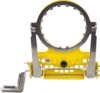
Flat Brim Cap Frame
- Affixing the upper frame simply by pressing allows correct alignment by aligning the center of the frame and the cap.
- The cap curves according to its natural curvature. It allows the original shape to be retained without any distortion or scratches without removing the frame.
Flat Brim Cap Frame Set
- Embroider closer to the brim with easy alignment and ratcheting mechanism
- The cap curves according to its natural curvature. It allows the original shape to be retained without any distortion or scratches without removing the frame.
- Includes hooping jig, cap frame, and driver
- Easy to attach and release
- No need for clamping
- Positioned so there is no contact between the brim of the hat and the machine
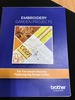
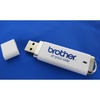
PR Playbook
- A step-by-step guide to the amazing features on the 10-needle embroidery machine
- 34 individual projects with accompanying videos—more than 5 hours of instruction
- The videos are located on the included USB drive and can be viewed from your machine as well as from your computer.
- Compatible with PR Series machine, PR1055X
- Includes one USB with 34 projects and video instruction
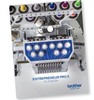
See Brother PR1055X Brochure
Three visions. Three businesses. Three stories to tell.
When will your business live in your home? Let's talk about business. People all over the country are starting their own home-based businesses making things they love and sharing their experience. Watch inspiring stories from some incredible makers and get tips and tricks on how to help start your business.
Perfect for embroidery enthusiasts, hobbyists, and crafters. Perfect for home-based entrepreneurs. And simply perfect for anyone looking to step up their productivity and creativity.
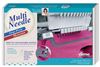
Introducing the Brother Entrepreneur Pro X PR1055X Multi Needle Embroidery Machine
- US Warranty 25 Years Head, 6 Years Electrical, 2 Years Parts, 2 Years Labor
- Extended US Warranty: Extended Warranty Available
- Non-US Warranty: 30 days parts and labor
Brother PR1055X Software version 1.80
Quick eference Guide for Brother PR1055X
Embroidery Designs Pattern List for Brother PR1055X
Installation Manual for Included Extension Table Set
Multi-Needle Comparison Chart Entrepreneur Pro X PR1055X, Entrepreneur W PR680W, Persona PRS100
NEW Brother accessories online catalog by machine model numbers
Basic Features:
- LCD Display Size (Diagonal): 10.1" (5.3" x 8.5")
- Display (Number of Colors): 16,777,216
- Stitch Select
- Onscreen Help
- 29 Built-In Tutorial Videos
- Built-In Languages
- On-Screen Editing
- Runway Lighting with 5 Built-in LEDs
- Manual Thread Tension
- Automatic 10 Needle Threading System
- 3 Individual Needle Attribute Settings: Maximum Speed/Color Anchor/Needle Threader
- Thread Sensors: Upper and Lower with On/Off
- Automatic Thread Cutter
- Thread Wiper
- Jump Stitch Thread Trimming
- Thread Trim Setting Key
- Vertical Quick-Set Bobbin
- 2 Full USB Ports
- Computer Connectivity with Update Capability
- Mouse Capability by USB
- Media Type: USB
- InnovEye Plus Technology
- High Background Camera Scanning
- Virtual Design Preview
- Wireless Compatibility
- Compatible with My Stitch Motor Mobile App
Embroidery Features:
- Maximum Embroidery Area (X x Y): 14" x 8"
- Maximum Embroidery Speed: Up to 1,000 SPM
- Sewing Speed for Frames 400 - 1,000 SPM
- Sewing Speed for Caps 400 - 600 SPM
- Free Arm Embroidery
- 4 Standard Included Frames: (14" x 8", 5" x 7", 4" x 4", 2" x 1.5") and ScanImation Scanning Frame (8.5" x 12")
- 1,184 TOTAL Built-in Brother Embroidery Designs
- 173 Embroidery Designs
- 140 Frame Designs (10 Shape x 14 Stitch Patterns)
- 100 Utility Stitch Patterns
- 30 Buttonhole Patterns
- 37 Basic Fonts
- 661 Decorative Font Patterns
- 18 Built-in Monogram Designs
- 25 Quilt Sashing Functions
- My Design Center Features
- Resume Function
- Built-in Border Function and Designs
- Color Sort Feature
- Color Shuffling 2 Function
- Pause Setting
- Appliqué Creator Function
- Create Multiple Appliqués in One Hoop
- Insert Letter at Midpoint of Text Line
- Input Second Line of Text
- Align Left, Center, Right
- Grouping after Line Break
- Edit Single Letter
- Edit Full Line of Text
- 3 Thumbnail Sizes (L-M-S)
- Grouping of Letters and Designs
- Direct Touch Button for Color Change
- Bigger Start/Finish Point Setting Area
- Direct Touch Button for Embroidery Order
- Manual Color Sequence
- Space Reduction Among Embroidery Alphabets
- Pattern Rotating: 0.1, 1, 10, or 90 degrees
- Drag and Drop Editing
- On-Screen Automatic Density Adjustment
- Basting Stitch Before Embroidery
- Smart Stitch Management: Forward or Backward/Direct Key Entry
- Preview Designs Before Stitching
- Stitch Simulator
- Stippling Feature
- Echo Quilting
LCD Panel Features:
- Display: Color 4.4"x7.3" ASV HD LCD display with enhanced 176° viewing angle and 16.7 + million colors
- Adjustable screen brightness setting
- On-screen tutorials, with videos & diagrams
- Zoom Function: 200% in Preview and 1600% in My Design Center
- On-screen editing: Rotate, mirror image, move, copy, enlarge/reduce, letter spacing, thread density, and group/ungroup edit functions
- Preview designs before stitching
- Screen saver: 5 built-in images included; personalized functionality
- Adjustable design icon size setting
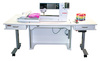
Workspace Features:
- Runway® lighting: 5 LED lights, equivalent to 35 standard bulbs - 5 customizable brightness settings
- Extra-large table (included)
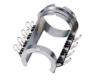
Thread and Needle Features
- 10 Needles
- 10 Spools
- Auto needle threading
- Numbered threading guides
- Eyelet threading system for consistent thread tension
- Thread anchor
Innovachrome™ LED Thread Color System:
Number of LED lights with on/off modes: 10
Correct thread color indication: Improved LEDs with brighter, more uniform colors, able to display more than 300 colors for visual indication of correct thread color
Light and audio cues, with on/off modes: Yes
Light and audio cues to alert thread change: Yes
Light and audio cues to alert thread breakage: Yes
Light and audio cues to alert finished design: Yes
Speed Features:
Sewing speed - frames: 400 to 1000 spm
Sewing speed - caps: 400 to 600 spm
Speed adjustment: Adjust individual needle speed from 400 to 1000 spm (frames); 400 to 600 spm (caps)
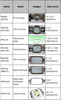
Built-in Designs and Fonts:
Built-in Brother exclusive designs: 110
Built-in alphabet fonts: 28 size-adjustable embroidery lettering fonts
Built-in alphabet designs: Renaissance, Floral, Appliqué and Greek
Monogramming font styles: 3
Coordinating Accents: 15
Frame Designs: 10
DESIGN EDITING FEATURES:
On-screen editing: Yes
Color palette: 300 colors
Artspira information from Brother USA
Design Positioning Features:
InnovEye® Technology: It's like having a built-in camera above the needle, providing a bird's eye view of the needle area
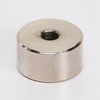
Snowman® Embroidery Positioning Marker: Works in conjunction with the InnovEye® Technology for precise positioning
Grid function: View grid and design on LCD display for precise alignment
Link machines to one computer: Link up to four PR1000 series or upgraded PR650 series machines to one computer
Allocate and queue designs: Yes
Queue up to 100 designs: Yes
Status monitoring on computer screen: Yes
Minimize thread changes: Yes
Memory And Media Recognition Features:
Built-in memory: 1.7MB; save up to 500,000 stitches to memory
USB ports: 3 ports; 1 high speed port, 1 port for machine peripherals, 1 port for computer connectivity and upgrades
Warranty 2 Year: Parts and labor. 6 Years: Electronic Components and Printed Circuit Boards. 25 Years: Chassis
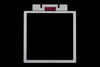
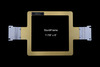
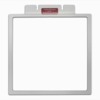
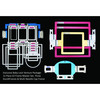
Machine Dimensions (H x W x D) 32.20" L x 29.84" W x 41.30 " H
Machine Weight 119.05 lbs
Brother Premium Warranty Documentation
We would like to inform you we have released a software update, version 1.80, for the Entrepreneur Pro X PR1055X on Brother Solutions Center. Updating your multi -needle embroidery machine with this software will enhance your embroidery experience.
- 3D font patterns are available (ver. 1.80 and higher)
- Added built-in character patterns in 14 categories for the PR1055X.
- Added new characters in the following font pattern categories:
- No.7 (Tennessee Extra Bold) for both the PR680W and PR1055X.
- No.10 (Calgary Medium Italic) for the PR1055X.
- No.8 (Brusseles Light) for the PR680W.
- Improved ability to determine a different thread color name when the thread brand changes but the thread color is the same or similar.
- Revised the wording of some Chinese messages and item names.
Please click here to visit the Brother Solutions Center to view/download the update. Once at the site, select your Operating System.
We would like to inform you we have released a software update for the Entrepreneur Pro X PR1055X on Brother Solutions Center. Updating your multi -needle embroidery machine with this software will enhance your embroidery experience. Version 1.10 Updates:
- Versatile magnetic frame M / L can be recognized on the machine.
- Update files can be downloaded directly to the machine by using wireless-LAN.
- Data landing page can be selected when using the Link function.
- Improved the function to be able to select and delete multiple pattern data at once.
- Improved the user-defined thread color sequence display on the screen.
* To learn about the above new features, read the instructions about the update Ver.1.10 in the Operation Manual Addendum. Please click here to visit the Brother Solutions Center to view/download the update. Once at the site, select your Operating System
Brother and Baby Lock Design Database Transfer Software
Hello Everyone! Just downloaded and played with the new Brother and Baby Lock Design Database Transfer program. This is a FREE program that allows you to transfer your designs wirelessly from your machine if it has the wireless feature! So cool! You can also search for designs, print catalogs of designs and manage your designs with this free program. You need to download the Baby Lock version for the Baby Lock machines or the Brother version for the Brother machines. Here are the links to the programs and manuals and also a Design Database class I have on Youtube. Enjoy!
Brother: https://support.brother.com/g/s/hf/pc...
Baby Lock: https://babylock.com/accessories/soft...
Jan's Design Database Class: https://www.youtube.com/watch?v=OztTd...
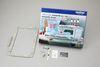
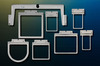
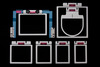
Included Embroidery Hoops: 4 (8" x 14", 5" x 7", 4" x 4", 1.5" x 2") and ScanImation™ Scanning Frame (8.5" x 12")
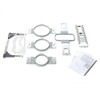
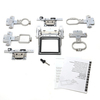
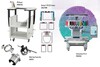
Included Frames and Accessories:
- 1.5" x 2" frame
- 4" x 4" frame
- 5" x 7" frame
- 8" x 14" frame
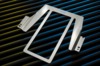
- Arm A Embroidery frame holder (for included frames)
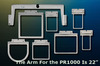
- Arm B Embroidery frame holder (for optional jumbo, border and quilting frames)
- Extra-large worktable
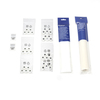
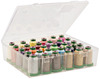
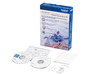
- Accessories kit (Includes needle sets, prewound bobbins, screwdrivers, spool mats, spool caps, USB cable, embroidery sheet grids and more)
Brother Compatibility Chart for PRS100, PR670E, PR1050X and Brother Hoops that Work with each model.
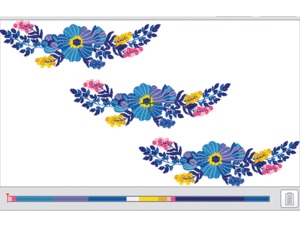
 Thanks to the lnnovEye Plus Technology, embroidery design connection is easy and more precise. Combined with the Snowman Embroidery Positioning Marker, you can reposition your design many times in many directions. Perfect for aligning designs for borders and quilt blocks.
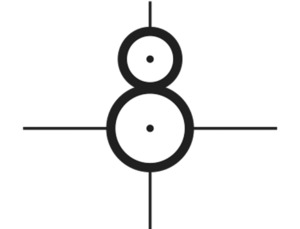 Pair with InnovEye Plus Technology to automatically position the design for precise embroidery placement. Choose from nine options for alignment of embroidery designs.
 It’s like having a built-in camera and scanner! The ability to scan the entire embroidery area provides virtually endless creative options and helps ensure that all your projects are perfect. Precisely place your design exactly where you want it every time. Just scan your fabric or garment, preview your design on screen, and you’re ready to embroider.
 Draw or doodle directly on the LCD display and watch it spring to life in the large drawing area. Or, use the industry-first ScanImation Scanning Frame to scan drawings, line art, handwriting or printed clip art, and have it transformed into embroidery data.
 When combining designs, you can be even more efficient by having the machine sort the stitch order by color which reduces color changes and needle bar movement to minimize embroidery time.
 Watch your creations become larger than life with the new zoom function of up to 1600% within My Design Center and up to 200% in other modes.
 Built-in HD tutorials make learning easy! View 29 tutorial videos directly on the high-definition LCD display, or stream your own creations using the industry standard MP4 format.
 Embroider up to 1,000 stitches per minute in just seven seconds flat with industry-leading high-speed acceleration.
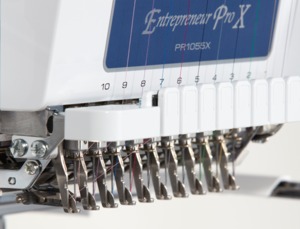 10-needle auto threading makes threading simple! As the only multi-needle machine with a built-in automatic needle threading system, you'll thread each needle in seconds - with just the touch of a button!
 Create beautiful sashing and border patterns sized perfectly for your quilt, up to 118" x 118"!
 Choose from 26 new decorative fill patterns with separate stitch settings to create unique designs.
 Explore 1,184 built-in embroidery designs including 140 frame pattern combinations, 40 size-adjustable embroidery lettering fonts, and 14 monogramming font styles.
 Get inspired by a wide range of creative designs and fun patterns that are sure to add some artistry to your next project.
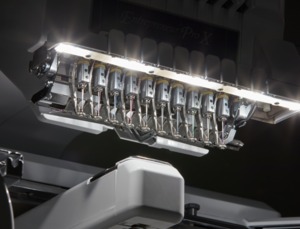 There’s no downtime with an important notification system, so you can be super productive. White lights under the needles flash to indicate project completion and thread changes or breaks.
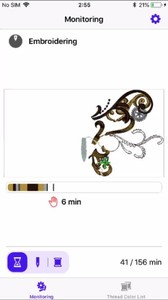 Follow the progress of your project and get alerts with the My Stitch Monitor mobile app on your iOS or Android™ device.
 Perfect for large projects, including quilts and jacket backs. Includes four sizes of embroidery frames: 14" x 8", 5" x 7", 4" x 4", 2" x 1.5". The machine will automatically detect the size of the hoop needed.
 Enjoy over 1,100 built-in embroidery designs and 40 size-adjustable embroidery lettering fonts.
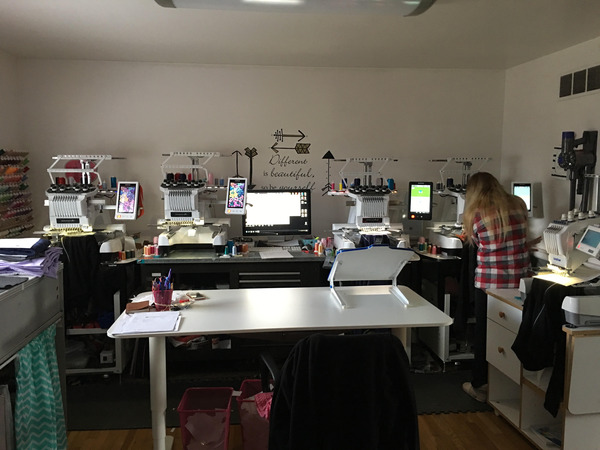 Tim Anderson's Brother PR Multi Head Embroidery Room!
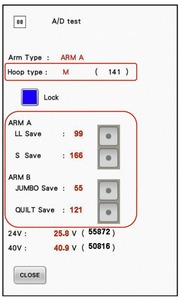 How to calibrate the hoop sensor
1. Enter the AD test mode.
- Hold the Start-Stop button and the Needle Threader button while turning on the power.
2. Attach the tubular round arm set A to the carriage.
3. Start the test mode and select #08: A/D test under "Main Board Test Mode".
4. Press the Lock (blue button) to unlock the A/D value of the hoop sensor. When the lock of the A/D value of the hoop sensor is unlocked, "Unlock" is displayed.
5. Press the LL Save after attaching the left arm of the tubular round arm set A to the position 2 and tightening the 2 thumb screws certainty.
6. Press the S Save after attaching the left arm of the tubular round arm set A to the position 5 and tightening the 2 thumb screws certainty.
7. Attach the tubular round arm set B to the carriage.
8. Press the JUMBO Save after attaching the left arm of the tubular round arm set B to the position 1 and tightening the 2 thumb screws certainty.
9. Press the QUILT Save after attaching the left arm of the tubular round arm set B to the position 4 and tightening the 2 thumb screws certainty.
10. If "Unlock" is on the screen, press Unlock to lock the A/D value of the hoop sensor again.
Limited Customer Access to A/D Test Mode 08
Do you have customers that you feel could perform the A/D test mode on their PR1050X without having to make a trip to your store? Save them a trip of bringing the machine!
Just follow these 4 simple steps:
1) Power off the machine.
2) Push and hold the start/stop and needle threader buttons while powering the machine on.
3) This will place them directly into A/D Test Mode 08.
4) Then you can walk them through the procedure remotely.
Once completed, restart the machine to return back to normal user mode.
Entering A/D test mode 08 in this fashion allows the customer limited access to this specific test mode and nothing more.
How to calibrate the hoop sensor
1. Enter the AD test mode.
- Hold the Start-Stop button and the Needle Threader button while turning on the power.
2. Attach the tubular round arm set A to the carriage.
3. Start the test mode and select #08: A/D test under "Main Board Test Mode".
4. Press the Lock (blue button) to unlock the A/D value of the hoop sensor. When the lock of the A/D value of the hoop sensor is unlocked, "Unlock" is displayed.
5. Press the LL Save after attaching the left arm of the tubular round arm set A to the position 2 and tightening the 2 thumb screws certainty.
6. Press the S Save after attaching the left arm of the tubular round arm set A to the position 5 and tightening the 2 thumb screws certainty.
7. Attach the tubular round arm set B to the carriage.
8. Press the JUMBO Save after attaching the left arm of the tubular round arm set B to the position 1 and tightening the 2 thumb screws certainty.
9. Press the QUILT Save after attaching the left arm of the tubular round arm set B to the position 4 and tightening the 2 thumb screws certainty.
10. If "Unlock" is on the screen, press Unlock to lock the A/D value of the hoop sensor again.
Limited Customer Access to A/D Test Mode 08
Do you have customers that you feel could perform the A/D test mode on their PR1050X without having to make a trip to your store? Save them a trip of bringing the machine!
Just follow these 4 simple steps:
1) Power off the machine.
2) Push and hold the start/stop and needle threader buttons while powering the machine on.
3) This will place them directly into A/D Test Mode 08.
4) Then you can walk them through the procedure remotely.
Once completed, restart the machine to return back to normal user mode.
Entering A/D test mode 08 in this fashion allows the customer limited access to this specific test mode and nothing more.
 The Brother PR1055X Embroidery Machine: More fonts, more editing capabilities, and more technology than ever before.
Recommended Accessories

Brother PRCLH1 Cylinder Frame Hoop Only, PR1000 PR650 PR620 PR600 Babylocks*

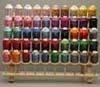
Brother Pacesetter ETKS 63 Spool Thread Kit 40wt Poly, 63 Cones x 1100 Yards Each

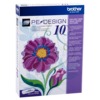
Brother SAVRPED10 PEDesign to v10 Embroidery Software Upgrade Only from v5-9.0


Other Items You May Be Interested In
-
Brother Trade In XP1 Luminaire Sew Quilt Broidery Machine +XP3 Upgrade Software Installed +Artspira +Design Database +USB & WiFi
RB Refurbished -
Brother Demo Luminaire XP3 Sewing Embroidery Edge TO Edge Quilting Machine USB/WIFI* +Artspira +4pc Luggage Set, BES Blue Software, 24 Disney Threads
Floor Model -
Brother XP3 Luminaire Sewing Embroidery Quilting Machine with $5000 Bundle: 4 Luggage Set, BES Blue Software, 24 Threads SDX325 and More
-
Brother Trade In PR680W 6 Needle Embroidery Machine +Wireless +Cross Hair Laser Drop Light, 10"LCD, 16Built In Videos, 50% Faster Start Up, Save $1500
Free Ground Shipping to the Contiguous USA RB Refurbished -
Brother PR1055X Side Hustle Superstar Bundle 10 Needle Embroidery Machine +$3,519 Values: PR Stand, PRPCF1 Wide Cap Frame, Jig, Driver, 7in1 EZ Frames
-

Brother DEMO Entrepreneur Pro X PR1055X 10-Needle Embroidery Machine, 8x14" Embroidery Area, , 10"LCD, Scan,
Floor Model -
Brother PR680W 6 Needle 8x12' Embroidery Machine, Color LCD, 4 Hoops, USB & Wifi +Cross Hair Sensor +Artspira +Pick1: Bundle, 0% APR or Trade In
$12,999.99 Free Ground Shipping to the Contiguous USA -
Brother DEMO PR680W 6 Needle Embroidery Machine +Wireless +CrossHair Laser Drop Light
Floor Model -
Juki QVP Tajima SAI Complete 8 Needle 8x12 Hoop Commercial Compact Embroidery Machine, 4 Flat Frames, Cap Eq, Laser Light, 6"Color Screen Writer Plus
$12,999.00 Free Ground Shipping to the Contiguous USA -
Brother PRS100 Persona 8x8 Sew Field, 6Flat &FreeArm Tubular Hoops, Disney Embroidery Machine +Pick1 0% APR, Or Trade In
$4,299.99 Free Ground Shipping to the Contiguous USA -

Brother Trade In Persona PRS100 8x8 Embroidery Machine Only, 6 Hoops, No Cap, No Stand, Optional Free Motion Quilting Extension Table & Foot Control*
RB Refurbished -
Brother PEDESIGN11 Full Version Software +Durkee STURDYPED12x14" SturdiFrame Split Design Hoop for PR600 PR620 PR650 PR655 PR670 PR1000 PR1050 PR1055
$1,599.99 Free Ground Shipping to the Contiguous USA Retail -
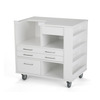
Arrow Kangaroo 9301B Ava B #1 PR Embroidery Machine Cabinet White, 4 Drawer, for Brother/Babylock PRS100, PR1X, PR600's PR1000 PR1050, PR1055X
$1,499.99 Free Ground Shipping to the Contiguous USA -
Brother PRCF5 4pc Flat Brim Hat Hoop 2.5x5" Mounting Bracket, Cap Driver, Universal PR1055 PR1050 PR1000 PR680 PR670 PR655 PR650 PR620 PRS100 Babylock
$1,369.99 Free Ground Shipping to the Contiguous USA -
Brother PRCF3 Cap Equipment 2.5x5* Hat Hoop Frame, Mounting Gauge, Driver &Tools for PRS100 PR600II PR620 PR650 PR655 PR670 PR680 PR1000 PR1050 PR1055
$1,099.99 Free Ground Shipping to the Contiguous USA -
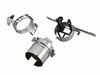
Brother PRCL1 3pc Tubular Hoop Equipment (Not a Hat Cap Frame) Includes Driver, Gauge, Cylinder Frame PRS100 PR620 PR670 PR680 PR1000 PR1050 PR1055 BL
$1,099.99 Free Ground Shipping to the Contiguous USA -
Brother PRPCF1 3pc Wide Cap Hat Equipment: Driver, Hooping Gauge, Hat Hoop Frame 270° 2.5x14 Wide for PR1000 PR1050 PR1055 +Babylock 10Needle Machines
$1,189.00 Free Ground Shipping to the Contiguous USA -
Durkee 12in1 Embroidery Hoop Package for the Brother PR1055X and Babylock Venture, 12 piece EZ Frame Master Set, 3 SizesSturdiFrames, Multi-Needle Cap
$999.99 -
Brother PRCL1 Demo 3 Piece Tubular Hoop Cylinder Frame (Not a Hat Cap Frame). Driver, and Gauge for PRS100 PR600's PR670, PR1000, PR1050X PR1055, BL
Free Ground Shipping to the Contiguous USA Floor Model -
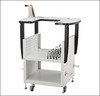
Brother PRNSTD2 New Style Metal Roller Stand, Hoop Hooks, 2 Wood Shelves & Table Top, Cap Holder, for PRS100 PR600's PR1000 PR1050X PR1055X, Babylock
$1,199.99 Free Ground Shipping to the Contiguous USA -
Brother PR10 8in1 Embroidery Hoops PRH60mm PRH100mm PRH130 PRH180mm PRH300mm PRF300 PRPH360 PRPJF360
Free Ground Shipping to the Contiguous USA -
HoopTech 599734 GEN2 Starter PKG Solution Hat Hoop Dream Frame +599775 Tbar Gauge. Add Required Brother/Babylock Cap Driver for PR1000 PR1050X PR1055X
$799.99 -
HoopMaster Hooping Station for Brother PR600, PR650, PR655, PR670, PR680, PR1000, PR1050 PR1055 Hoops, Babylock Multi Needle Embroidery Machine Hoops
$799.99 -
Brother PRWT1 Wide Extension Table Top 30x15" Included with PR10, Optional for PR600 PR620 PR650 PR655 PR670 PR680 +Babylock Multi Needle Machines*
$769.99 Free Ground Shipping to the Contiguous USA -
Brother PRVMFLKIT 5x7 Flash Frame Magnetic Hoop Kit Lg with Four Clamps and Driver Arm Complete for PR1055 PR1050 PR1000 PR680 PR670 PR1X Babylocks
$549.99 Free Ground Shipping to the Contiguous USA -
HoopTech 599493 Brother SA599 PR2 Larger Chassis Base Unit, Rail Mounted Clamp, 11x5" and 8x5" Window Frames Set for PR6 PR10 Babylocks
$699.99 -
Brother PRVMFL 5x7" Magnetic Flash Frame L(Large) with 4 Clamps, Hoop Only without Driver for PR680 PR1055 PR670 PR1050 PR655 PR1000
$439.99 Free Ground Shipping to the Contiguous USA -
Brother PRCLP45B Arm D Driver, Tubular Center Clamp Hoop, Shoe Sides, Dog Collars, Name Tapes on PR655 PR670 PR1000 PR1050X PR1055X
$659.99 Free Ground Shipping to the Contiguous USA -
Brother PRMS360 Hoopnetic Magnetic Sash, Border and Quilting Frame 7.87 x 14" for PR1050X PR1055X PR1060X, PR1000 PR1000E, PR670E, PR680W, PR1X
$499.99 Free Ground Shipping to the Contiguous USA -

Brother PRVMFMKIT 4x4 Flash Frame M(Medium) Magnetic Hoop Kit +4 Clamps +Driver Arm Complete for PR1055X PR1050X PR1000 PR680W PR670E and Babylocks*
$499.99 Free Ground Shipping to the Contiguous USA -
Brother XF6607001 Cap Driver Wide Only Supply Assy for PRPCF1 or Hoop Tech Gen2 on PR1000 PR1000 PR1050 PR1055 or Babylock Enterprise Valient 10Needle
$499.99 -
Brother PRCW1 4 Fabric Cutting Needles +Cutwork Software +Firmware UPG Upgrade for PR650, PR655E & PR1000/E, NOT for Newer Models PR1050/55, PR670/680
$499.00 Free Ground Shipping to the Contiguous USA -
HoopTech 599374 Metal Roller PR6STAND w/Cap Post, Shelf, 4Casters 4Feet, Brother PRS100 PR6 PR10 Babylock Multi Needle Embroidery Machines, Heat Press
$669.99 -
Brother PRVMFM 4x4" Magnetic Flash Frame M, 4 Clamps, Hoop Only without Driver Arm for PR680W PR670 PR655, PR1055X PR1050X PR1000 and Babylocks*
$439.99 Free Ground Shipping to the Contiguous USA -
Brother PRCLP45LR Left & Right Clamp Hoops w/o Arm D Driver for .8x1.8" Designs on Larger Shoe Sizes for PR6 670E PR1000 1050 1055 Embroidery Machines
$599.99 Free Ground Shipping to the Contiguous USA -
Brother PRPRFK1 Babylock ENRFS 3in1 Round Circular Hoops 4, 5 and 6" Frame Kit with Arm C for PR1000, PR1050X, PR1055X, PR655 PR670E PR680W, Babylocks
$439.99 -
Brother PRPBF1 4x12" Continuous Border Frame Clamp Hoop for PR1000 PR1050X PR1055X, Requires PRPUGK1 Upgrade w/ Pattern Connect to use Camera, Snowman
$439.99 -

Brother PRSK2 Starter Kit, PRS100, PR600-PR1050x, Babylock Embroidery Machines
$399.99 Free Ground Shipping to the Contiguous USA -
Brother PRTTI PRTT1 Expandable Sliding Support Extension Table for Tubular Hoop Frames: PR1055 PR1050 PR1000 PR680 PR670 PR655 PR650 PR620 PRS100 PR1X
$439.99 Free Ground Shipping to the Contiguous USA -
Durkee 8in1 EZ Frames +Arm for Brother PR1X-1055X & BL, Heavy Duty 3/16" Aluminum Tubular Hoops 2x4 2.5x5 3x4 5x4 7x5 8x8 8x12"+Cap Back/Radius Frame
$479.99 Free Ground Shipping to the Contiguous USA -
HoopTech GEN2 Solution Cap Hat Hoop Dream Frame, HoopTech 599734 for Brother or Babylock 10 Needle PR1000 PR1050x, Requires Tbar Gauge and Driver*
$399.99 -

Brother PRCLPM1 Tubular Clamp Frame 4x4" Patch Hoop M +Arm Connector Frame Holder D for PR1055X, PR1050X, PR1000, PR670E, PR680W, PR1X, Babylocks
$439.99 Free Ground Shipping to the Contiguous USA -
Brother PRPCFH4 Wide Cap Frame Only, 2-3/8X14" 360mmX60mm Hat Hoop for PRPCF1 on PR1000, PR1000E, PR1050X, PR1055X, Babylock 10 Needle Emb. Machines
$329.99 Free Ground Shipping to the Contiguous USA -
Durkee 7in1 EZ Single Frames & Arm: Brother PR600-PR1055, Heavy Duty 3/16" Aluminum Tubular Hoops 2x4 2.5x5 3x4 5x4 7x5 8x8"+Cap Back Ø(Fast Frames+)*
$449.00 Free Ground Shipping to the Contiguous USA -
Fast Frames 102-022 (Brother SAFF022) 7in1 Arm & 7 Tubular Hoops for Brother Freearm PR1000 PR1050X, PR1055X Babylock ENT BNT
$379.99 -
Brother PRPJF360 14x14" Sq 360x360mm Reversible Jumbo Frame Hoop for Split Designs on PR1000, PR1050X, PR1055X, Babylock
$329.99 Free Ground Shipping to the Contiguous USA -
Brother PRCFH3 Cap Holding Hoop Frame Only for PRCF3 2.5x5in on PRS100 PR1X PPR600II PR620 PR650 PR655 PR670 PR680 PR1000 PR1050 PR1055, Babylock
$329.99 Free Ground Shipping to the Contiguous USA -
Multi Task 8x8" Purse Bag Hoop Frame #5 for Brother PR1000, PR1050X and Babylock 10 Needle Embroidery Machine
$328.99 Free Ground Shipping to the Contiguous USA -
Brother PRHCK1 Compact 4Hoop Tubular Freearm Frames 1.25x1.75 Round, 2x2 Square, 1x3 Oblong, 1.3x1.3 Portrait +Embroidery Arm E for PR6 PR10 Babylock*
$439.99 Free Ground Shipping to the Contiguous USA -
SewTech Brother PR10 Needle, 8in1A Embroidery Hoops: PRH60mm PRH100mm PRH130 PRH180mm PRH300mm PRF300 PRPH360 PRPJF360
$299.99 Free Ground Shipping to the Contiguous USA -
Hoop Tech 599919 3.0x3.75in Pocket Clamp+ 599555 Framing Gauge. Clamp Attaches to your existing Brother Babylock PR1000 PR1000E PR1050X Cap Driver
$299.99 -
HoopTech 5.5”x2.5” Small Compact Back of Hat Clamp Frame, Rear Cap Embroidery, Brother PRS1 PR6 PR10 Babylock, Tajima Multi Needle Embroidery Machines
$369.99 -
Fast Frames 101-015 Karate & Belt Hoop Frame 3x9" for Brother PR6 to PR1000, PR1050X PR1055X, Babylock Multi Needle Machines
$339.99 -

Fast Frames 101-014 Military Name Tag Tape Embroidery Hoop for Brother PR600 PR620 PR650 PR655 PR670 PR680 PR1000 PR1050 PR1055 +Babylock Multi Needle
$349.99 -
Brother PRCFH5 Flat Brim Cap Frame Hoop Only for PRCF5 3pc Cap Equipment PR1055X PR1050 PR1000, PR675 PR655 PR650 PR620, PRS100 Babylock Models
$269.99 Free Ground Shipping to the Contiguous USA -
Brother PRCLH1 Cylinder Frame Hoop for PRCL1 on PR1055X PR1050X PR1000 PR680 PR670 PR650 PR620 PR600 PRS100 Babylock Multi Needle Embroidery Machines
Free Ground Shipping to the Contiguous USA -
Multi Task 12x8" Purse Bag Hoop Frame #4 Brother PR600-PR1000 Babylock
$279.99 Free Ground Shipping to the Contiguous USA -
Brother PR 4in1 Embroidery Hoops 2.3x1.5" PRH60mm, 4x4" PRH100mm, 5x7" PRH180mm, 8x12" PRH300mm PR600 PR620 PR650E PR1000E Babylock EMP BMP8 ENT BNT10
-
HoopTech 599453 SlimLine 1 Clamping Chassis with Adapter 599444 for Brother/ Babylock PRS100, PR6 and PR10 Embroidery Machines
$339.99 -

Brother SASTURDY12 X14" DURKEE Sturdi Split Design Hoop Frame for 6 & 10 Needle PR600 PR620 PR650 PR655 PR670 PR1000 PR1050 PR1050X needs PE Design 11
$249.95 -
Durkee EZ-4 PC PR 6 & 10 Needle Kick Start 4in1 EZ Frames Tubular Hoops 3/16" Aluminum for Brother PR6 PR1000 PR1050 PR1055 2x4 5x4 7x5 8x8 for A Arms
$299.95 Free Ground Shipping to the Contiguous USA -
Brother PRPQF200 8x8" 200mmX200mm Square Hoop Quilting Frame for PR1-6-10 Using Embroidery Arm B 30x14" Extension Table for Traditional Quilt Blocks
$219.99 Free Ground Shipping to the Contiguous USA -
Brother SAPRBOOK2 Entrepreneur Pro X PR1055X Babylock Valiant Playbook, One USB with 34 projects & video instruction, Spiral bound book, In Stock
$169.99 Free Ground Shipping to the Contiguous USA -
Multi Task 4x4" Purse Bag Hoop Frame #2, Brother PR600-PR1000 Babylock
$219.99 -
Brother PR Carla Reale 4 Hour 6 Videos USB for PR600 PR650 PR655 PR670 PR680 PR1000 PR1050X PR1055X, BabyLock BL6-10 Multi Needle Embroidery Machines
$199.99 -
Brother PRMHA50 2x2" Tubular Magnetic Hoop Clamp Frame and Arm Set for PR1X, PR670E, PR680W, PR1055X
$199.99 Free Ground Shipping to the Contiguous USA -
Multi Task 5x7" Purse Bag Hoop Frame #3 for Brother PR600-PR1000 Babylock
$219.99 -
Multi Task 2.4x1.6" Purse Bag Hoop Frame #1 Brother PR600-PR670E, PR1000-PR1055X, Babylock
$219.99 Free Ground Shipping to the Contiguous USA -
Durkee Quilt/Border Sash Frame Hoop w/Clip Clamps 8x8 8x12 8x14 or 14x14 Jumbo for Brother BabyLock Tubular Arm Multi Needle Machines PRS100 PR6 PR10
$199.00 Free Ground Shipping to the Contiguous USA -
Fast Frames 102-012 14x14" Jumbo Hoop Brother PR1000 PR1050X PR1055x, Babylock Multi Needle Embroidery Machines
$199.99 -
Fast Frames 102-032 Largest Deep Bag Hoop 14x7" for Brother PR1000, PR1050X, Babylock BNT10L, BMV10 Embroidery Machines
$199.99 -
Fast Frames 101-032 Deep Bag Hoop Frame 12x8" Brother PR6, PR1000, Babylock
$199.99 -
Brother PRHSL200 3x8" Sleeve Frame Tubular Hoop: PR1X 650 655 670 680 1000 1050 1055 1060 Babylock Multi Needle Embroidery Machines w/Hoop Recognition
$179.99 Free Ground Shipping to the Contiguous USA -
Hoop Tech 599919 3.0x3.75in Pocket Clamp for Cap Drivers on Brother PR1000, PR1050X, Babylock 10 Needle Embroidery Machines (Requires driver)
$199.99 Free Ground Shipping to the Contiguous USA -
Brother PRMH50 2x2" Tubular Magnetic Clamp Hoop Only for Arm, on Entrepreneur 6-Plus PR670E, PR680W to PR1055X
$129.99 Free Ground Shipping to the Contiguous USA -
Brother PRBW1 Babylock EPBW1 Metal/Plastic Rotary L Bobbins Thread Winder PRS100 PR1X PR600's PR670 PR680 PR1000 PR1050 PR1055, BL EMP6 BMP6 BMP8 BMP9
$249.99 Free Ground Shipping to the Contiguous USA -

HoopTech 599462 APR2RD 2" Round Slimline 3 Pc. Window Clamp for Brother PR6 PR10 and Babylock Multi Needle Embroidery Machines
$128.99 Free Ground Shipping to the Contiguous USA -
HoopTech 599438 Slimline SAPR5RD, 5" Round 2 Piece Window Clamp for Brother PR6 PR10, Babylock Multi Needle Embroidery Machines
$139.99 -
Brother PRPH360 Large Hoop Frame 8x14 360X200mm PR1000 PR1050 PR1055, Use Embroidery Arm A and 30x15" Extension Table Support for Flat Hoops
$109.99 Free Ground Shipping to the Contiguous USA Retail -
Brother PRH180 Babylock EPF180 180x130mm 5x7 XC5959051 Embroidery Hoop Frame PRS100 PR600 620 650 670 680,1000,1050,1055,BL EMP6 BMP8 BMP9 ENT10 BMP10
$99.99 -
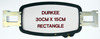
Durkee PR3015 12x6" Hoop & Brackets for Brother PR6, PR1000, PR1050X, PR1055X, Babylock
$69.99 Free Ground Shipping to the Contiguous USA -
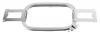
Durkee PR12.5x24cm 5x9" Hoop Frame & Brackets for Arm A on Brother PR600's, PR1000, PR1050X, PR1055 Babylock 6-10 Needle Embroidery Machines
$66.00 Free Ground Shipping to the Contiguous USA -
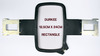
Durkee PR2424SQ Square 9x9" Hoop & Brackets for Brother PR600 PR620 PR650 PR655 PR670, PR1000, PR1050, Babylock* Sews 8x8" or Split Designs up to 4x8"
$66.00 Free Ground Shipping to the Contiguous USA -
Durkee 8x12in x 3/16in Thick Aluminum Hoop Frame one of many Tubular EZ Flat Frames for Brother and Babylock PR6 to PR10 Needle Embroidery Machines
$59.95 -

Durkee 12x4" Optional Hoop for use with 7in1 Tubular EZ Frames, Heavy Duty 3/16" Aluminum for Brother Babyloci PR6 to PR10 Needle Embroidery Machines*
$59.95 -
Durkee PR18RD 7" Round Hoop & Brackets, Brother PR600 PR1000 Babylock
$49.99 -
Fast Frames 101-020-013 Lg 11x7" Hoop Frame, Add on For 7in1 on Brother PR6, PR1000, PR1050X, PR1055X and Babylock Multi Needle Embroidery Machines
$49.99 -

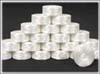
FilTec 12434 P-15 Brother PRWB135YD x100 Magnetic Core Magna Glide Pre Wound L Style Bobbins 60wt Poly Thread White for PRS100 PRX1 PR6 PR10, Babylock
$49.99 -
Durkee PR12RD 4.5" Round Hoop, Brackets, Brother PR600 PR1000 PR1050X, Babylock
$49.99 -
Durkee PR09RD 3-3/16" Round Hoop Brackets Brother PR600 PR1000 Babylock
$49.99 -
Durkee PR15RD 5.5" Round Hoop, Brackets, Brother PR600 PR1000 PR1050 Babylock
$49.99 -
Durkee PR1515cmSQ 6x6 Hoop Frame +Brackets for Brother PR600 PR620 PR650 PR655 PR670 PR680 PR1000 PR1050X PR1055 +Babylock Freearm Embroidery Machines
$42.00 -
Brother XC7206001 Genuine Orignal Metal Bobbin Case PRS100 PR600 PR620 PR650 PR655 PR670 PR680 PR1000 PR1050 PR1055 Babylock 1-10 Needle Emb Machines
$29.99 Free Ground Shipping to the Contiguous USA
